TeamViewer enables techlove support to connect to your machine remotely and examine and attempt to fix your support issue. I am able to see the screen, control the keyboard and mouse and fix things (for example, change files on your system). This ability terminates when we terminate our support session. No one else can access your system unless you start TeamViewer and give them the session passcode. So, don’t do that.
The process is simple but may require some adjustments to complete:
- Download TeamViewer
- Install TeamViewer
- Configure TeamViewer on Mac to share screen and keyboard
- Open TeamViewer and enable Remote Control
- Call me and we’ll start a session
If your system is out of date, we may need an older version of TeamViewer. Please follow the instructions in this post to determine your Mac and operating system versions.
Download Teamviewer QuickSupport
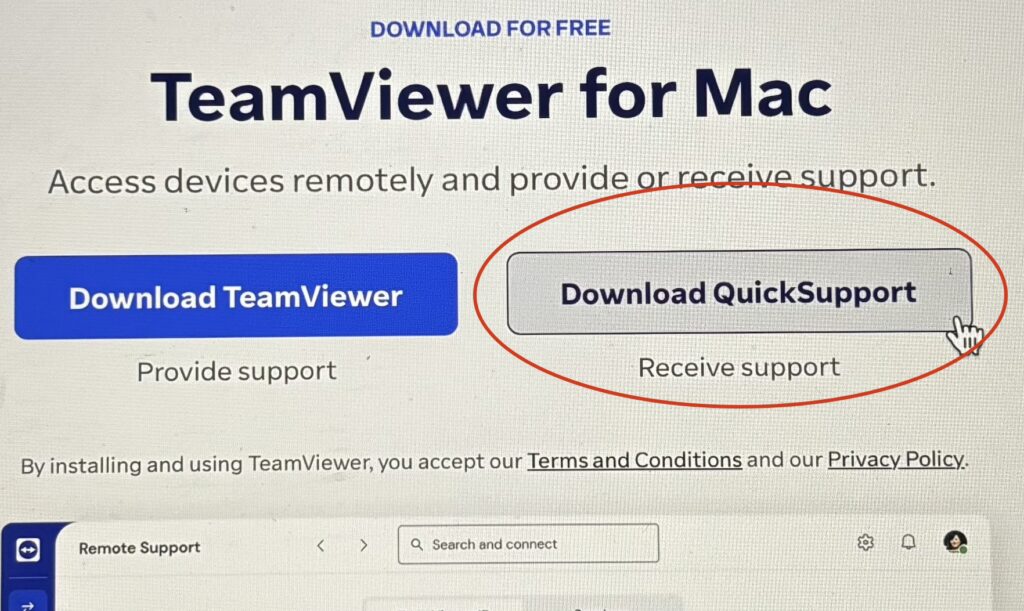
Visit this link and download QuickSupport
NOTE!
The default location of the installation file is Downloads. However, you may be prompted to choose a location. I recommend either Downloads or Desktop.
Install TeamViewer
Now you run the install program. Using the Mac Finder, navigate to the install file (either the Downloads or the Desktop folders) and either double click or use the Command + O (Open) key combination. You should then see this install window.
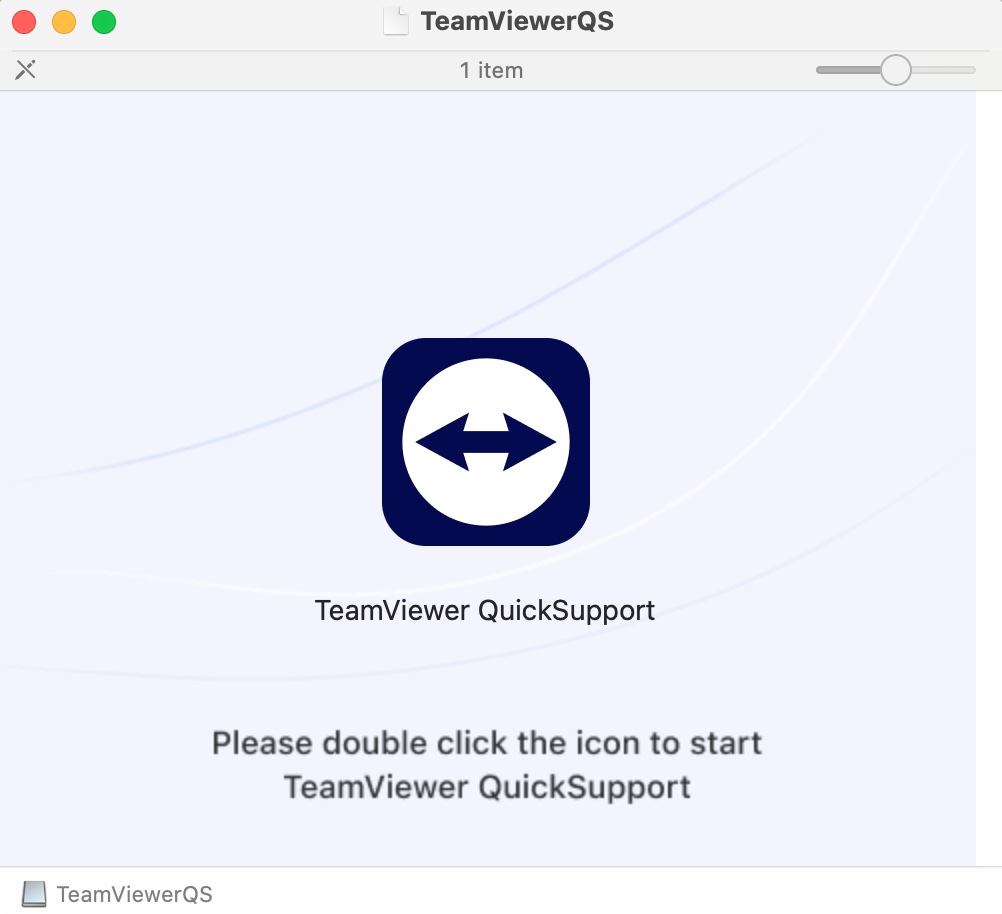
Now you need to double click the TeamViewer icon to start the installation process. The installation process will probably step you through several prompts. These are standard software terms and conditions which you may have seen hundreds of times but I wanted to point these out in case you have never seen these before.
The first prompts are legalese regarding privacy, a standard software EULA (end user license agreement) and one about “data processing” in which you agree to allow the software company to collect a minimum of information about you in order to “improve your experience” and they promise not to sell or publish your details. Don’t worry, they don’t have your credit card number. They have mine.
Configure TeamViewer (Prepare for Support)
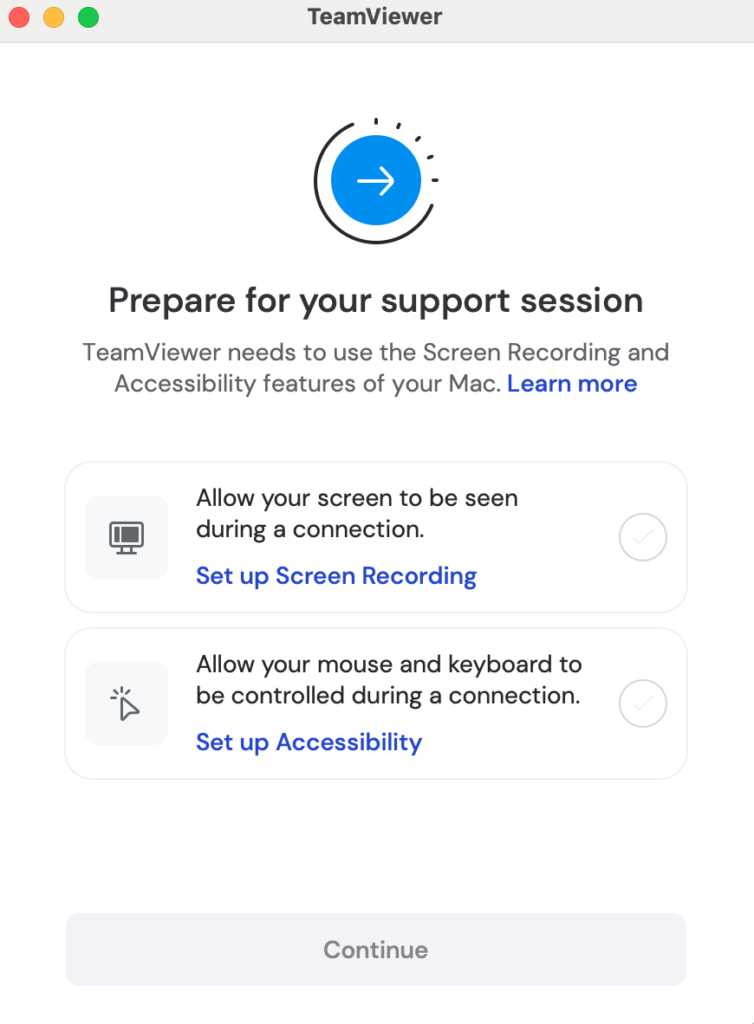
After the files are copied and installed you will be prompted to enable support to actually help you by seeing your screen and controlling your mouse and keyboard so support can address your computer or mobile device problem.
When you click Set up Screen Recording your Mac system Settings app will open. You should see an image similar to the one below but if not, navigate to settings/privacy & security/screen & system audio recording
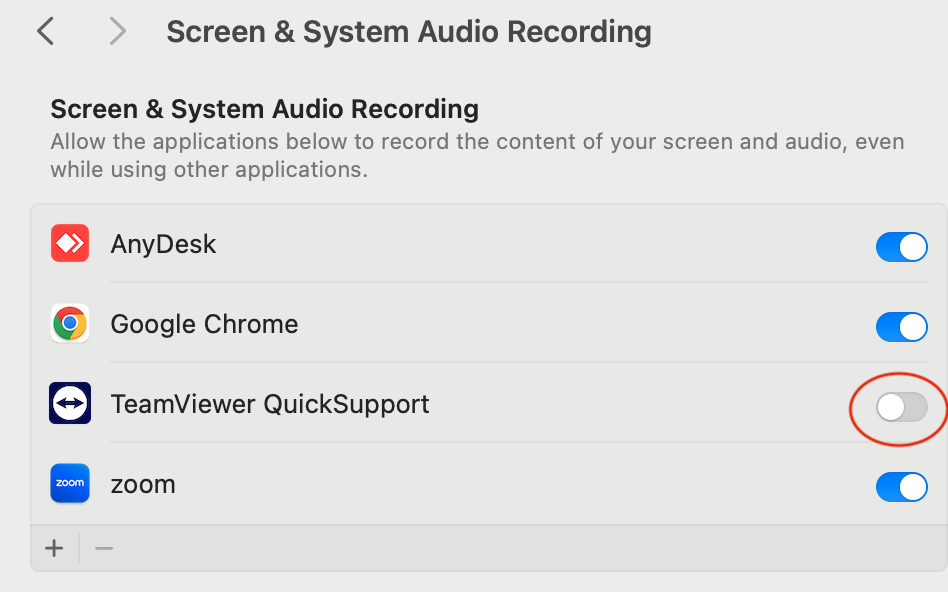
You need to click the switch it toggles from gray to blue (or light to dark, off to on). You will be prompted that this change won’t work until you quit and restart the install but for now, choose Later.
Now we will click Set up Accessibility.
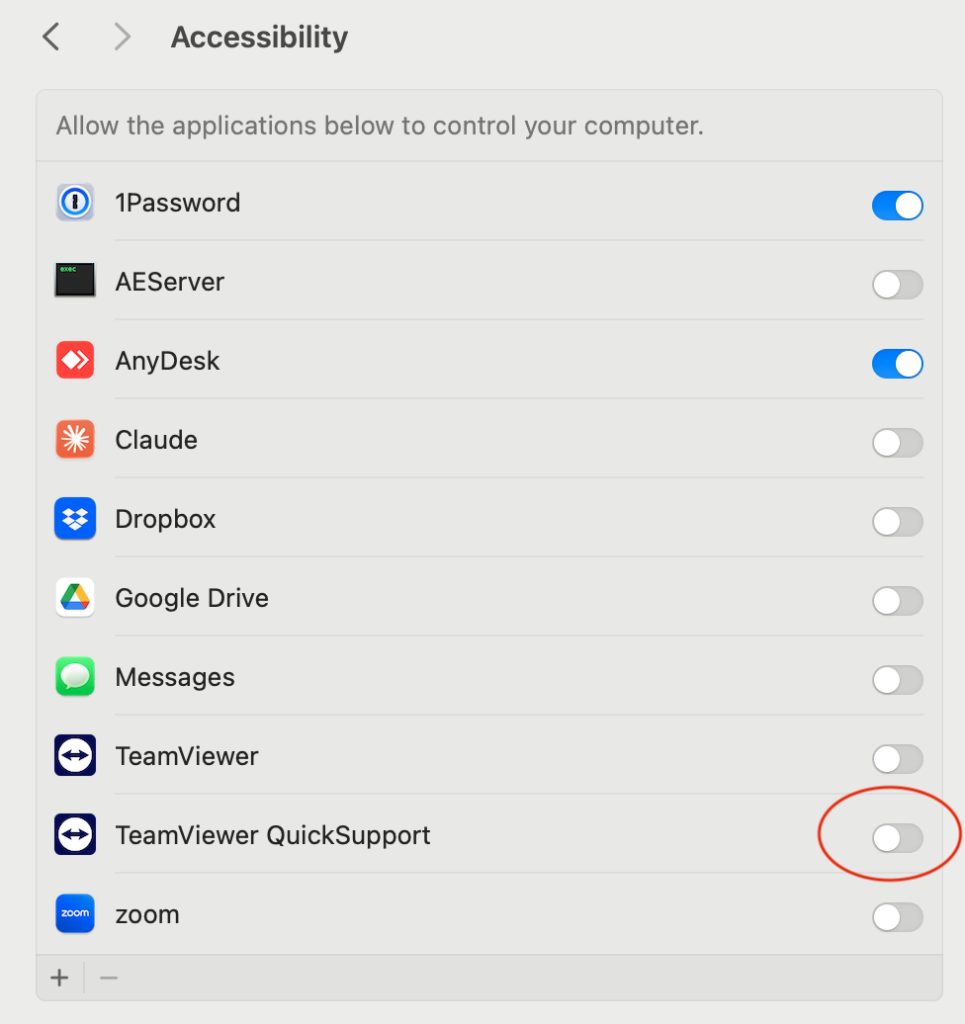
Again, toggle the TeamViewer QuickSupport button from off to on. You may again be prompted to restart the install. You may do that from the prompt or from the TeamViewer menu (Quit).
I actually recommend a full system Restart at this point. Click the Apple icon in the upper left corner of your Mac screen and choose Restart.
Your install experience may not follow these steps and screens exactly, but we can talk this through over the phone and get you ready for support.
TeamViewer Remote Control
Now, we are ready to get to work!
Let’s start the TeamViewer QuickSupport program. (Click here if you have trouble finding it in applications.)
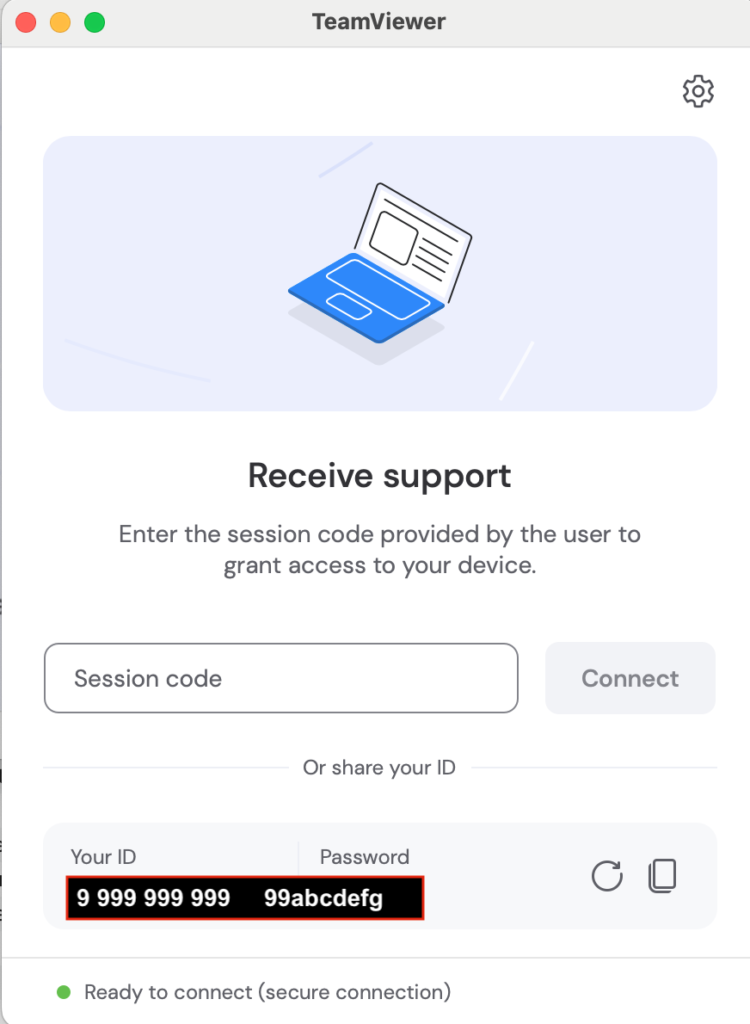
You should see a prompt like the image to the right. Wr will ignore the Session code box for now.
Over the phone, never over a text message, you will share the ID and that temporary 8 digit password with me. I will enter it on my side and you will see a prompt for you to give me permission to start a remote session.
That is pretty much it!